Saturday, November 5, 2011

Ready to Change Gears

Currently 49 degrees - lots of French Rats running around below me as I was up on the roof today (French Rats = squirrels).  They must be preparing for the approaching winter.

After working a couple half days on the playhouse during the week I found that I was completely out of 3/4" exterior grade plywood except for several oddly shaped pieces that I did not want to use as sheathing on the roof.  A mosaic pattern of smaller pieces would simply not work as it would not be as strong and may look bad from inside if I decide to stain the beams and sheathing.  After getting some coffee in me early this morning I scratched a note on the back of a scrap of paper in the kitchen - 2 plywood, 5 2x10 by 10 boards, 1x8 syp, Liquid Nails, wood for penguin (more about that later), and then ran off to the home center.  After picking out what I needed I went to the rental counter and checked out the $19/hr truck, which is easily justified as I do not want to own a truck.

The dormer was very difficult to sheath and it is going to be even more difficult to put the paper and roofing tiles on the right side as there is almost no place for the ladder to rest.
About two hours later and back at the playhouse I measured and cut about ten inches off of one of the sheets and tied it into the straps under the hoist and went upstairs and applied Liquid Nails (glue) to the joists and edges of the other pieces of plywood sheathing where this last, large piece will go.  I looked across the front yard and saw Elizabeth planting flowers in the beds and asked her if she would not mind helping for a few minutes.  I hoisted the wood up and asked her to pull the rope to the outside as I pulled the straps that were around the plywood toward me and into place as I stand on a ladder on the inside of the second floor.  She made a nice comment about how amazed she was that my "contraption" works.  She then asked how long I have been thinking about the project.  I don't know...a while.

Soon enough I had the last three fifteen inch wide pieces of sheathing cut at a 28 degree angle on the upper edge nailed and glued to the top of the front side.  That completes the sheathing for the Pointed Playhouse.

We will need to get a light in here soon.
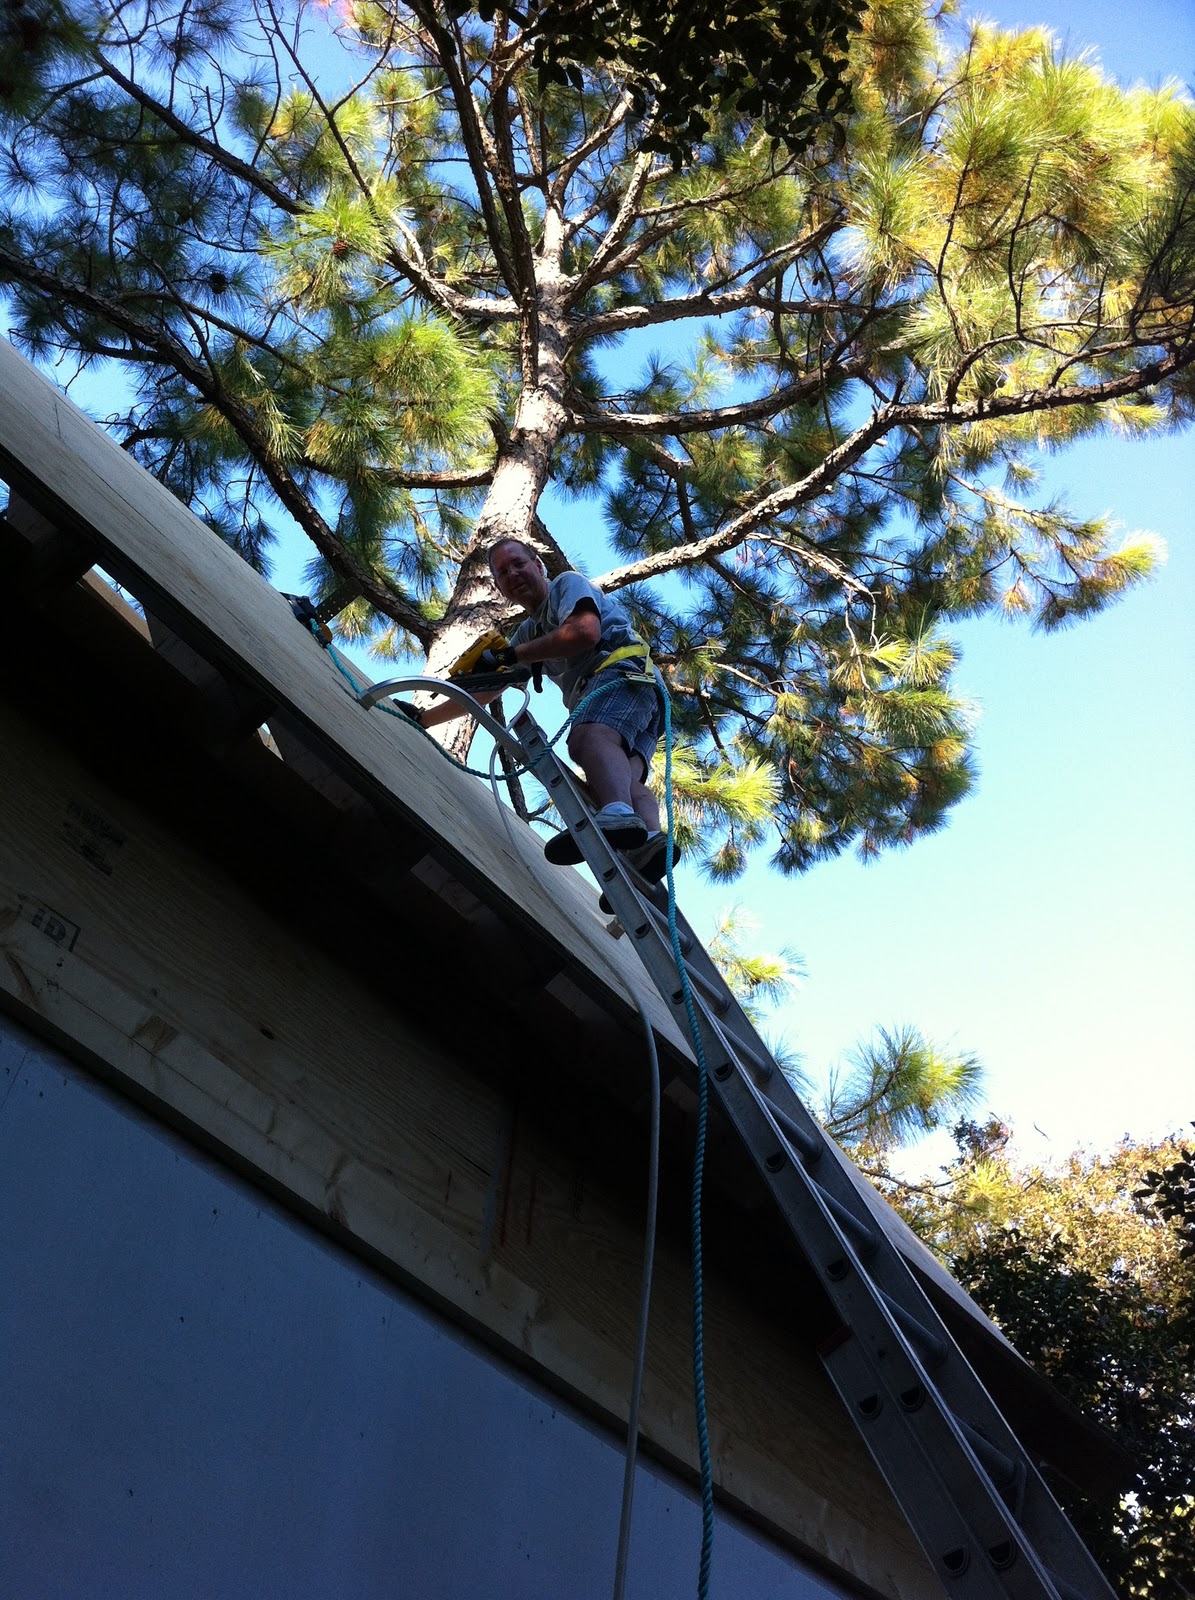
Tied into the safety rig by the large "D" ring at the top of the roof.

Last small piece of the far end went in just after this shot.
I could get back up on the roof tomorrow and start with the tar paper and then roofing tiles but I think I will change gears and get some of the exterior walls and windows done instead along with the opening to the loft area.  The small house should be somewhat weather tight and I can afford to wait about a week to start the last roofing tasks.  It has been very difficult for me up on the roof during the past week and I'm ready for something different and less demanding.

And I have been asked to help Devon with a project where she wants to build a full size penguin for a school project.  Maybe paint a detailed picture of a penguin on one side and a landscape of penguins marching across the snow on the other.  She took this video today and I'm going to keep it in case she wants to one day get into film school (I don't want her in film school).


Spotify has been great today - listened to Jazz all day while outside and now I'm listening to "A Tribute to Led Zeppelin - The Battle of Evermore", which I find goes well with the wine next to my mouse.


Wednesday, November 2, 2011

Cirque du Soleil Roofing Company

56 degrees and sunny.  No sign of the bats.

Well, this morning I again tried to take time off from work but I had a teleconference from 8:30 to 9:30 and then about five calls and several email messages that required responses.  After working on the Playhouse during the day I eventually went into work for a few hours and I'm just now returning home and writing into this Blog and have a fresh glass of wine in front of me.

I wanted to complete the sheathing on the back side of the house but I first decided to setup the harness, safety rope and D-ring that attaches to the rafters at the very top to protect me if (when) I fall.  This ended up taking more than an hour.  I don't mind a few safety tips in instructions but these instructions where nothing but a big safety clause followed by several disclaimers from the lawyers.  I get the point - if I use this thing and die anyway then it is still my fault.  But it was nice to see that it was made in America.

Tightening the security line as I go up.
Looking and feeling uncomfortable.

I positioned that ladder against the back wall and began raising it using the rope.  I also connected the large horseshoe shaped aluminum piece to the very top of the ladder, which provided greater stability.  It was nice to work up there with a stable ladder and the safety harness in place so that I could concentrate on the task of getting the roof built and not having 50% of my brain taxed with worrying about falling.

After the back side was done I moved to the front and my neighbor, Royden, came over and helped me with the sheathing around the dormer.  I first measured the width from the outside wall of the dormer to the edge of the roof with about a half inch overhang.  I then measured up to the first place where the sheathing will need to be cut at an angle and then I determined the location of the top of the dormer ridge beam.  This will be were the angled cut terminates.  We laid out these lines over a fresh piece of plywood.  However, we determined that it would be best to cut the width of this first sheet short by one rafter otherwise the edge that will meet up with the next sheet will not be centered on the rafter.  Like the entire back side I glued the rafters and edges where the plywood meets the next sheet and nailed it in place.  I almost need a light in the upstairs room now that the sheathing is going up.

Sheathing around the right side of the dormer.
Can't see the sun through the sheathing.
Well, I anticipate about another day of sheathing and then I will apply the paper and architectural asphalt tiles.  Bring on the snow!


Sunday, October 30, 2011

And Up Goes the Roof - Scary

56 degrees with a few bats - I don't  believe they bite like the Hampton Roads summer mosquitoes.

We had a big storm roll through here on Friday night and I took Saturday as a rain day as well.  I had the tarp down inside the second story and it did collect water.  I siphoned most of the water out of the tarp but then had to try to pour the remaining water out the window.  I bunched up the tarp at the far end and tried unsuccessfully to lift the ball of water out the window but it turned out that I cannot squat two hundred pounds after all (8.5 pounds per gallon times 25 gallons).  Some of it poured out on the floor but most of it eventually went out the window to the ground below.  As a side note, I spent about 30 minutes sweeping the water around the floor to ensure that it did not pool in one area.

After lunch my very good friend "Bobcat" helped with the sheathing on the roof.  I started by measuring and cutting the narrow eleven and a half inch wide plywood to cover the ends of the rafters that splay outward at the bottom edge of the roof.  I used a T-bevel to get the angle of the edge that will eventually meet the full sheets of sheathing above.  I had to move the hoist over to the far side of the roof and then Bobcat and I cut and hauled the bushed (really trees) to the curb.

Bushes cut way back.
Maybe a place for the kayak rack?
After tying full sheets of plywood onto the straps of the hoist we pulled the sheathing into place.  I used Liquid Nails before setting the adjoining edges into place.  It was nice to see the edge of the plywood and the rafter align nicely.  It was very difficult to get the foundation and the first floor to be entirely square and level but it is all paying off now.

Much of the far side has received sheathing.
Hey - see the sheathing through the upper window?
I had to cut the sheathing around the large pine tree, which almost makes this a tree house.


Okay - the lines have been snapped and the first course of sheathing is up with a little more installed on the far side - now time for a little fun.  With help from visiting family I hauled pieces of a haunted castle that I built last year for the kids down from the attic.  It took us two days to put this together because we had very high winds on Saturday as the storm departed the area.  It is Halloween and I can't wait to scare the little kids.

Scary - hope the wind does not blow it down.

Well, now for the city to do its part - my gardener has big bags of leaves on the curb and we added a few branches from behind the Pointed Playhouse.

More later when I get the time.

Thursday, October 27, 2011

Siri, for the third time...Finish the Dormer!

80 degrees - is it still October?

I worked most of the day and then came home and had a few hours to finish up the framing of the dormer.  The weather was great and I brought as many tools as I could up to the second floor to concentrate on the dormer.

I started by measuring and cutting the long 2x4s that extend diagonally from the upper horizontal 2x6 that supports the small ridge beam down to the lower sides of the outer dormer wall.  I wasted one piece of 2x4 because this sixty degree angle was difficult and I initially cut it too short.  And that is why Home Depot always has more 2x4s.  Once those were installed I cut the the horizontal pieces from the outer wall to this new diagonal stud.  The two support blocks under the 2x6 were added and then I was able to measure for the sheathing for the sides.  Once this was glued and nailed I had to cut the rafters 3/4" wider to allow for room for the sheathing and then nailed the ridge beam and rafters into place.

Again, had to hand plane the rafters to fit like a piece of furniture.
A picture taken as I was hanging out over the exterior wall.  I think I have the dimensions for the beams correct.
Here are a few more pictures of the side sheathing and the interior space.


Nice open space inside the dormer.

Looks like a complex framing project - it was.
Side sheathing ready for the roof sheathing to meet at a 90 degree angle.
And here is one more picture out the other window to the backyard.  I really need to get after the grass.


Building a playhouse fact - power tool batteries are like ink cartridges.  I have three old and large Ridged batteries for a set of power tools that I bought several years ago and only two marginally work and the other is entirely dead.  I have to run back and charge the two good batteries every fifteen minutes and I'm really trying to not buy any new tools for this project.  The home center carries newer batteries but they are $99 each, which makes me think that it makes more sense to just go out and buy another printer (oops, I meant set of power tools).

Wednesday, October 26, 2011

Change of Plans

74 degrees - another beautiful day.  Some small flying bugs but I don't think they were mosquitoes.

This morning I had to take care of some business over email but then began working on the Pointed Playhouse again.  I was left alone except for a telecon that lasted an hour at noon.  I would like to say that it was a productive day but my expectations were greater than my accomplishments.

I started up on the second floor measuring the dimensions of the opening and referencing my Sketchup drawings for the dormer window.  The distance between the rafters was fairly wide, 46 1/2 inches, and I thought that I would take advantage of this space by creating a larger dormer to give a little more space for the kids up in the loft area.  Thankfully my neighbor Royden came by and we talked a little about the project.  He made some very valid observations - (1) the rafters should splay out like the other larger rafters, and (2), the dormer should be narrow.  I initially explained to him that I had this great idea about creating a little more space by widening the exterior facing wall of the dormer but as soon as he left I changed my mind and went with his suggestion.  He was right.  The design of the overall building would not look correct if I did not make the dormer narrow, which must be slightly wider than the window.

Here are a few pictures from the layout of the framing and the plywood sheathing.  I again used the plywood to draw out the placement of the 2x4s.

Framing standing up as I applied the beam ends.
I used a hand plane to get the joints to fit tightly.
Layout over the plywood sheathing.
Original plans - deviated.
I then used the hoist to get the small end wall up after I nailed the sheathing onto the framing.  It was a little precarious as I lifted the wall in front of the window on the first floor.  I bet that people who do this for a living install the windows toward the end of the project.


Soon after the picture I ran upstairs to lift the wall using the rope.
I also decided to keep the ridge beam for the dormer simple and did not cut a birds mouth and opted for a cut similar to the lower beams but on a larger scale.  This beam is about six and a half inched tall.

The two short rafters that I cut to attach to the main ridge beam were installed down to a new horizontal 2x6 that I nailed high up and between the existing opening for the dormer.  I measured a level line from where the dormer ridge beam sits and to the sides of the main rafters to know where to cut the short rafters.  The horizontal piece now carries the other end of the small ridge beam.

See the new, small ridge beam?
Dormer face leveled and nailed.  The small ridge beam is installed too.
Well, I said that I was not going to do this but I found myself working in the dark.  Nothing dangerous but I had to use the light on my iPhone to find everything before I came inside.  I'm very happy with the scale of the dormer now that I can see the finished framing up on the Pointed Playhouse.

Monday, October 24, 2011

The Last Rafter

72 degrees.  Sunny with almost no wind.

(Sunday)
More of the same today - I cut the remaining rafters down on the saw horses and then glued and nailed the tail section that splays out to make it look like the roof widens at the bottom.  I then moved the ladder around to the four corners and measured, cut, glued and nailed the second 2x6 inside pieces to the upper boards to give them some mass.

Sketchup rendering of the rafters.
Completed rafters.  The dormer and window are next.
Here are a few more pictures from the day.

Doubled up the upper beams.

Almost feels like a loft.
I'll try again to adjust my schedule a little and take a couple half days to work on the dormer window and then begin to install the sheathing.  Once the sheathing is up the building will be somewhat weather tight.  There is a chance of rain on Thursday and the girls keep talking about using the Playhouse for Halloween, which is in just a week.

A little character from Mike when he was living in Egypt.  Now sits upon the timber above the door.

Sunday, October 23, 2011

Cutting Rafters

65 degrees with mostly sun and a few dark clouds.

(Saturday)
This morning I got up and uncovered my stacks of plywood and 2x6 material from the tarps and began building the small triangular shaped sheathing pieces that go around the top ends where the ridge beam now sits.  I glued and nailed these pieces into place and also nailed the ridge beam where it is now centered into the opening.  It is nice to see the stacks of wood finally clearing out.

The two saw horses were setup to hold my one rafter that I'm now using as a master template for all of the other rafters.  I first cut four to then see how they actually fit.  I tried to get all of these measurements accurate back when I had the plywood on the driveway as I was building the end walls but I wanted to just cut four and get them up on the top of the building before I cut the others.  Thankfully they all fit well.

Last bit of sheathing on the top of the side wall is done and the four rafters are nailed onto the outside.
I cut spacer blocks for the rafters that are attached to the outside of the building at a 30 degree angle on the ends of the spacers to make them look nice.  You can also see how I cut the bottom of the rafters to flare out a little.  This is similar to the way the German Pointed House was constructed.

The rest of the day was spent cutting the rafters and gluing and nailing the tails.  The ridge beam had a little bow in it but this was easily resolved by setting in the center rafters and clamping them in to force the beam to be strait.

Fourteen rafters up, fifteen more to go.

Hey, get down from there!

Outer rafters nailed into place.

The rafter template down on the horses.

Nailing in the top of the rafters to the ridge beam.

The center rafter needs to be clamped to force the ridge beam into place.
Well, it was another productive day.  More rafter building tomorrow and then I will be able to start sheathing the back side of the roof and framing the dormer window.