83 degrees with good weather. High mosquito count - 3 per cubic yard.
(really Thursday evening)
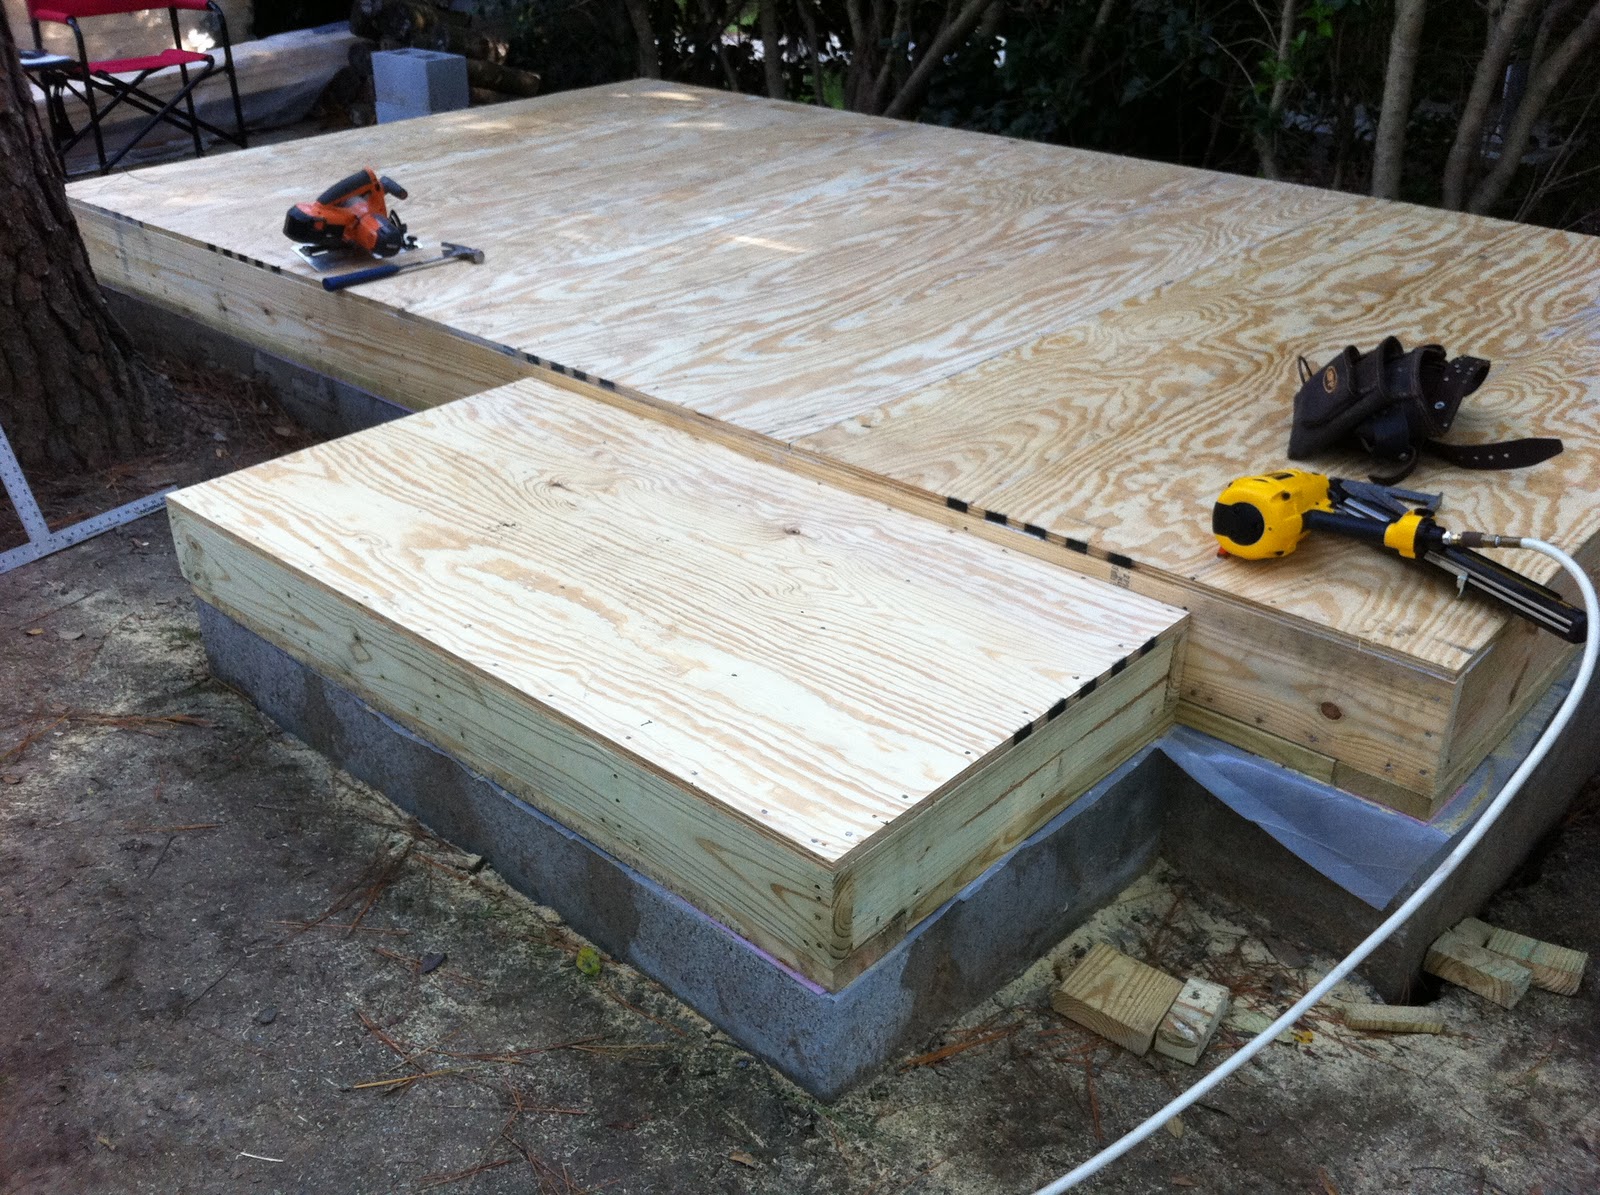
I framed the floor joists and cut and nailed the 3/4 inch plywood flooring to the "lean to" sill plate. The rim joist was nailed very well to the rim joist of the main structure to tie them together.
 |
| Lean to flooring is complete. |
Then, I cut the top and bottom plates for the far wall at 14 feet and began cutting the 8 foot studs to length and laying them out between the plates. Once square I covered the studs with a house wrap. I know that I may hear from some of you about this but putting the house wrap under the sheathing appears to be the best way to go. I did much research on house wrap and vapor barriers and the consensus is that house wrap is not a vapor barrier but does prevent water infiltration. It should go under the exterior material (i.e. siding) but obviously should not be the final finished surface. Water vapor actual passes through the house wrap and allows the house to breath. Later I will add insulation and put the paper vapor barrier toward the inside wall.
 |
| Far wall in Sketchup. |
 |
| House wrap ready to roll out. |
 |
| Stapling the wrap down to the studs. |
 |
| Easy? I guess. |
After the wrap was down I installed the sheathing and glued the edges with Liquid Nails and used hot dipped galvanized nails in the framing nail gun. This first wall is ready to go up if I get get help lifting it in the morning. I estimate that it weighs about 250 pounds, which should take about three people to safely put it in place. I may even put a coat of primer / sealer on the exterior surface while the wall is still down in the morning as this is supposed to dry very quickly. More later.
 |
| Ready, lift!!! |


No comments:
Post a Comment